The difference between a successful AV project and a non-successful AV project is preparation. That’s why pull lists are at the center of many AV projects. So, it should be no surprise that the first thing you see when you open a Find Boxes project is a pull list.
What is a pull list?
Pull lists are checklists of items that must be on the job site. They give staff the needed amount and where to pull the item from. While a spreadsheet can operate as a functional pull list, we wanted to add features to avoid costly mistakes. The Find Boxes pull list page aims to help employees get their jobs done and keep them accountable, so let’s review the Find Boxes pull list.
The Features
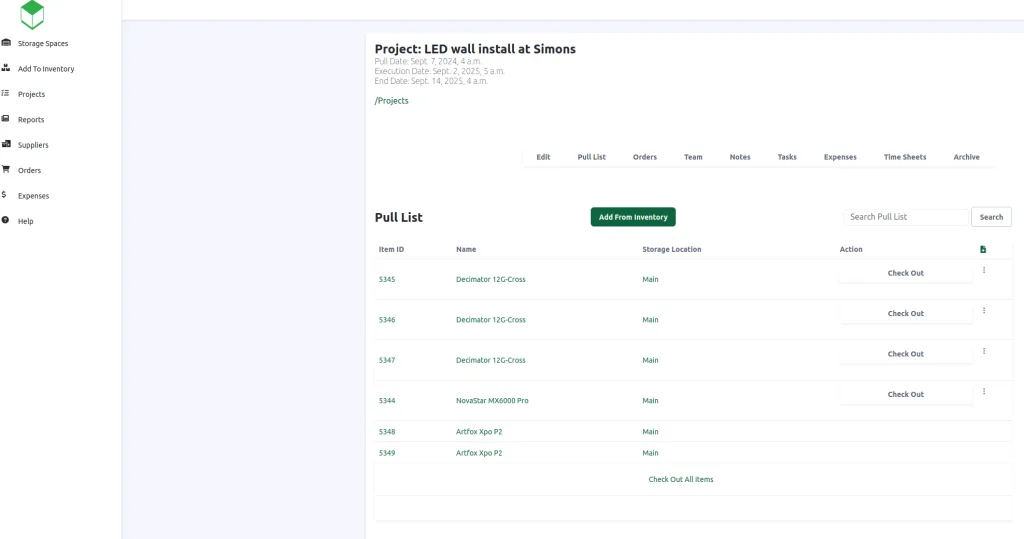
The first thing you’ll notice about the pull list page is that it lists all assigned items for the project that reside in your inventory. You can even download the pull list in a CSV format by clicking the export button in the last column on top of the pull list table. If you are looking for a specific item on the pull list, you can type the item name in the search bar, and the application will filter the pull list to only the items assigned to the project that match your query. If you need to add items from your inventory to the pull list, click the “Add From Inventory” button. Find Boxes will show you everything available on the dates specified in the project details. Find boxes will not allow you to double-book an item.
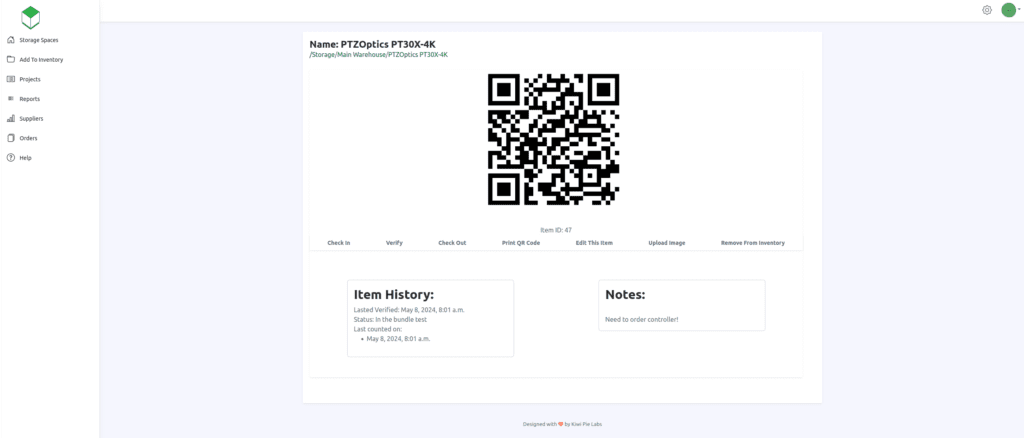
You will see the item name, location, and different actions on each line of the pull list. If you click on the item name or location, you’ll see the equipment page for the item. The equipment page gives item history, status, future projects assigned, future individual checkouts, photos, and more.
Next to the item location, you have the item actions column. The actions available are “Check Out,” “Check In,” “Remove,” and “Revert to Order.”
When staff are loading equipment for the job, we want them to check out each item. Checking items out ensures they have all the needed items for the job and are ready to take them to the job site. We also have a “Check Out All Items” button if you don’t want your teammates to check out each item line by line.
If your project is classified as a non-permanent installation, you must check in your items once you return the equipment to the storage location. Checking in your items places them back into your inventory and allows them to be used in other projects. The “Check In” button is only available to non-permanent installations.
If you don’t want an item on your project anymore, you can remove it by clicking the three-dot menu button and pressing the “Remove” Button. This action will make the item available for check out by other projects.
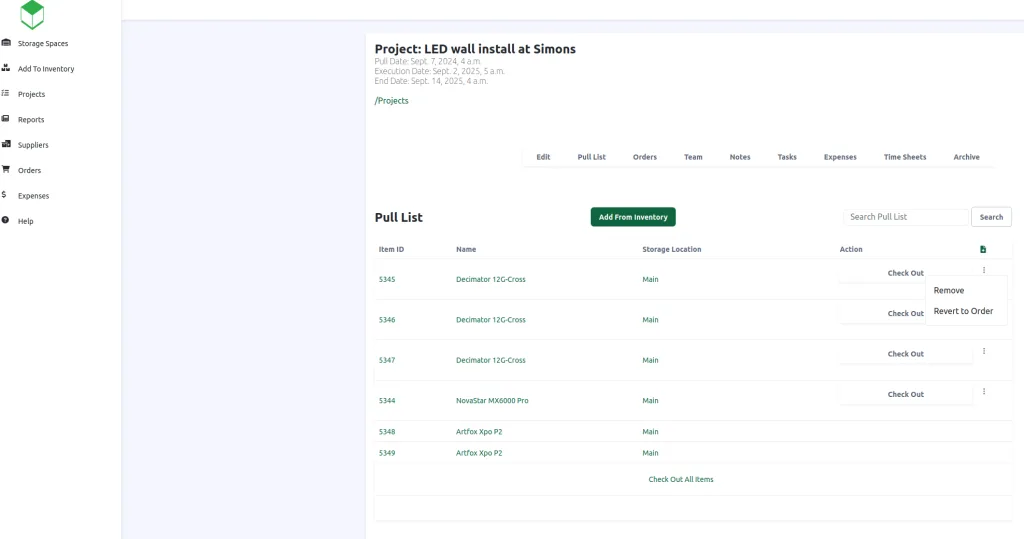
Lastly, you have the “Revert to Order” button. This option is only available when the item starts as a purchase order for the project. Clicking this button in the three-dot menu will remove the item from the pull list and the general inventory, and then make it an unreceived order under the “Orders” list. The “Revert Order” feature is handy if a teammate mistakenly receives an order in the system.
Wrapping Up
Now you’re ready to get your team pulling orders with Find Boxes! Over the coming weeks, we will be posting about each part of a Find Boxes project. Check back to get all tips on Find Boxes and AV project management. If you want to try Find Boxes, you can sign up for a month’s trial with no credit card needed to sign up. Click here to start your trial!
